|
|
Kit Building Guide | |
| Ham Radio India | ||
|
| ||
| Home | Forum | Radio Astronomy | Shopping Mall |
| ||||||||||||||||||||||||||||||||||||||||||||||||||||
|
Resources | ||||||||||||||||||||||||||||||||||||||||||||||||||||
| Amateur Radio | |
| Radio Astronomy | |
| Ayurveda | |
| Yoga | |
| Gita | |
| Web Directory | |
| Amateur Software | |
| News Channels | |
| Shopping Mall | |
| Free Classifieds | |
| Photo Gallery | |
|
How to? - Kit Building | |||||||||||||||||
|
| ||||||||||||||||
|
SPECIAL CONSTRUCTION NOTES | |||||||||||||||||
|
COMPONENTS ON SOLDER-SIDE OF PC BOARD
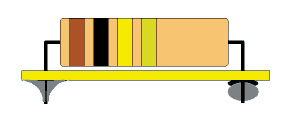
99.9% of all parts in all kits are mounted on the component side (top side) of the drilled PC board. Occasionally, the assembly will call for a small capacitor or resistor to be soldered across two points on the bottom side of the board. When this is required, be sure to cut away excess wire to avoid shorting other PC-board connections. In the picture above, left side solder joint is considered ideal. DC OPERATING VOLTAGES, ON-OFF SWITCHES, ETC. Most Ramsey Kits are designed to be battery-powered, and most major kits designed for our standard case and knob sets have internal 9-volt batteries and on-off switches. The Mini-Kits generally operate over a wide range of voltages, from 3 to 18 volts, with 6, 9 or 12 volts being standard. Your kit manual specifies the ideal operating voltage for that kit. It is up to you to supply a switch, wires, battery holders, etc., for the small kits. Hint: it's good practice to use red hookup wire for the DC positive (+) and black for the negative (-). THE FINISHING TOUCHES! Although you will be anxious to "turn on" your project, take one last look at the wiring and soldering connections. A few minutes spent now can save you hours of troubleshooting time later! Look for solder bridges, cold solder joints, missed connections, reversed polarity on components, and stranded wire shorts. Touch up ANY solder connections that seem less than perfect. ONCE YOU APPLY POWER...IT MAY BE TOO LATE!
| |||||||||||||||||
|
| |
|
| |
|
| |
|
|

